Monday, September 29, 2008

Never use Partition Magic in a dual boot windows/ Linux

GParted couldn't change a partition on a external hard disk from fat 32 to ext3. So I tried to do do it with Partition Magic. It being a external disk a reboot didn't seem part of the process but it was and it screwed up my system. Unable to boot into Linux. The grub menu was easily restored. But after that error 17, unable to write, read-only file system and x server could not be launched etc. The mount commando was crucial in discovering that the root parttion wouldn't load.

Through WWW it became clear the fault should lie in the fstab; located in ~/etc/fstab , that was indeed totally screwed up.
Important commands in this field:
sudo fdisk -l


sudo blkid


or
ls /dev/disk/by-uuid -alh


Compare the results with the fstab file that you can open with sudo gedit /etc/fstab when you're in the root. This already solved a lot of problems but still it didn't work.
Finally I found the error the defaults options was listed before the filesystem description (ext3) in stead of after... Also I had to recreate the home folder in the right partition (another one as the root partition). So first delete it in root and sudo mkdir /home
and then sudo mount /dev/sda7 /home

The only good thing about all this misery was that I was able to solve it, but damn I 'm gonne deinstall Partition Magic.

Saturday, September 27, 2008

Best backup tools for ubuntu?

Quote:
What's the best tool to perform backups? I'm between two: rdiff-backup or rsync.

Answer:
rsync just mirrors, so if you backup nightly, make a change on tuesday, make another change on wednesday and on thursday you want to revert to tuesdays backup because wednesdays changes were borked, you can't. With rdiff-backup you can.

However, it ultimately depends on what you are backing up though. If you are backing up files which do not change much e.g. photos, music and video, then rsync may be better.

I use a combination of both, rdiff-backup for nightlys of /home and rsync for media (photos, movies, mp3 etc).
Another view:
I use rdiff-backup for incremental backups every day and once a month I make a whole backup by using partimage or mondo


Complete system backup is zinloos onder linux, het enige wat je volgens mij grofweg nodig hebt is:
  • database dumps
  • /home/*
  • /etc/*
  • dpkg --get-selections > packageslisting.txt
  • /usr/local/*
Binaries e.d. zijn totaal niet interessant omdat je die via dat apt-get commando in een mooie lijst kan krijgen die je met apt-get set-selection weer terugzet.

Complete Backup useless

Complete backup system is useless under linux, the only thing I think you need is roughly:


  • database dumps
  • /home/*
  • /etc/*
  • dpkg --get-selections > packageslisting.txt
  • /usr/local/*

Binaries etc. are not interesting at all because you get that through that apt-get command in a nice list. With apt-get set-selection you will be able to put that back again.


Third opinion:

There are two types of backups that I do. The first is a backup of several key folders, not my entire system. This is in case I blow something away, or lose some data that I’d want to get back quickly.

I use the rsync command for this. Rsync is a simple and fast way to make an exact copy of something. That something can be a single file or a whole file system.

Now my external hard drive is a firewire drive, which Ubuntu thoughfully mounts in /media for me with the wonderful name of ‘ieee1394disk’. That’s where I want to keep this backup copy. Let’s open up a terminal session and go backup some stuff.

cd /media/ieee*

Now I’m in my external drive. If you have a USB disk, chances are it’s under /media/usbdisk or /media/whatevertheheckyoucalledit. I’m going to make a folder to store this backup in because I’m something of a filesystem neat freak.

mkdir arsgeek_backup

cd arsgeek_backup

Now there are four directories that I back up on a regular basis. These are my /home directory, my /etc directory my /opt directory and my mp3 collection. :) My mp3’s are located on a FAT32 partition mounted in /media/sda5 in a folder called music. So here’s the command I use to copy all of these.

rsync -arvu /home /etc /opt /media/sda5/music .

Here’s what the switches after the rsync command mean. a= archive, r= recursive, v= verbose, u= update and z= compress.

What I like about this is that while the first rsync does take some time to copy all of these files and folders the first time it’s run, the next time it’s run it only adds new stuff. So if I run this once a week and the only changes that were made was that I added several new mp3s to my music directory, it will only copy those new files.

If I accidentally deleted an mp3 that I wanted, I could easily (and through the GUI) go to my external drive and copy it back. Or if I accidentally deleted my /home directory (yikes!) I could rsync it back by reversing the command:

cd /home

rsync -arvu /media/iee*/arsgeek_backup/home .

I also plan on upgrading my laptop, which is my primary work computer, to Edgy Eft when it comes out on October 26th. (PLUG!) I’ve put a lot of work into getting my laptop just the way I like it, so I’m going to take a complete backup of the system before I do the upgrade. In fact, I’m doing a new backup while I type this howto. To do that, I use the tar command.

I’m going to back up all of the most important folders to me, however I’m not going to back up certain parts of my install, like the /tmp directory, or the /sys directory or anything mounted in /media like DVD’s or the external disk that I’m backing up too! That would be messy. So we’ll use the tar command with some excludes built into it. It’s a bit long and ungainly looking but it works like a charm.

First, I move into my external drive.

cd /media/iee*

Then I make another directory for my complete backup

mkdir arsgeek_wholeshebang

cd argeek_w*

Now I’m ready to back my machine up. This is going to take a while, so it’s a good idea to do it when you won’t need to power off your computer.

sudo tar cvpzf arsgeek.backup.tgz –exclude=”/proc/*” \

–exclude=”/lost+found/*” –exclude=”/dev/*” \

–exclude=”/mnt/*” –exclude=”/media/*” –exclude=”/sys/*” \
–exclude=”/tmp/*” –exclude “/var/cache/apt/*” /

As you can see, that’s quite the command. Here’s how it breaks down. Tar is the program we’re using to make a backup copy.

The switches work out as follows: c= create, v= verbose, p= preserve permissions, j= bzip2, f= file.

arsgeek.backup.tgz is the file we’ll end up with, a complete and compressed archive of my entire ext3 filesystem.

- -exclude=”/something” is a directory or file that you’re explicity telling tar not to back up. If we were doing this in the same filesystem we were backing up, it would be important to exclude the arsgeek.backup.tgz file. Since we’re doing it to an external drive however, we don’t have to worry about that.

the / at the end tells it to start from the top level (or root) directory of my filesystem. It will start taring at / and get everything that lives beneath it except for those directories and files we told it not to get.

This will chug along for quite some time until eventually we’re left with a massive file called arsgeek.backup.tgz. So if things go horribly, horribly wrong how do I restore my computer?

Here’s how I would do it. I’d first reinstall my laptop with a fresh Dapper install. No updates, same hard drive partitions as before. Then, I’d log in, attach my external drive and go to the backup file.

cd /media/iee*/arsgeek_w*

sudo tar xvpfz backup.tgz -C /

Be warned however that this will overwrite anything and everything in any of the directories you’ve tared up. So /home will get completely over written with whatever’s in your tar file and the same for everything else. Again, this will take some time.

Once that’s done (and note that you’re doing it from within a running OS! Neat!) simply log off and log back in again. Phew! Glad you had a backup plan!

source: http://www.arsgeek.com/2006/10/18/how-to-back-up-and-restore-your-ubuntu-machine/


Partimage

but what if you need a full system restore. Check out partimage, I know it is in the repositories (Universe or Multiverse). Only problem is it can't back-up mounted file systems. Just boot into the live CD. Install it from the repositories, and run the command "sudo partimage"


Backup using rsync and crontab
Here is the way I do my backups. First you will need to understand crontab. Here is a good link:

http://www.adminschoice.com/docs/crontab.htm

You can edit your crontab file like so:
Code:
crontab -e
my crontab file consists of the following:
Quote:
30 22 * * * /home/nick/backup-scripts/backup-home
30 22 * * * /home/nick/backup-scripts/backup-win
30 22 15 * * /home/nick/backup-scripts/backup-media
30 22 * * * /home/nick/backup-scripts/backup-school
So according to the crontab I run 3 backups every night a 22:30 (10:30 pm), and 1 backup every 15th of the month also at 22:30 (10:30 pm). I basically run a script at the specified times. The scripts you probably would be interested in are backup-home and backup-school.

Here is backup-home:
Quote:
#!/bin/sh
/usr/bin/rsync -avx --exclude=.aptitude --exclude=.rnd --exclude=.qt /home/nick /media/backup

/usr/bin/rsync -avx --exclude=.aptitude --exclude=.rnd --exclude=.qt /home/nick /media/ext-backup
One note about crontab files is to only use absolute paths. Also always place an extra newline at the end of the crontab. The first command says to backup my home directory on /media/backup. The second command says to backup my home directory on /media/ext-backup.

Here is backup-school:
Quote:
#!/bin/sh
/bin/rm -f /media/backup/school-backup-*
/bin/rm -f /media/ext-backup/school-backup-*
/bin/tar cvpzf /media/backup/school-backup-`/bin/date +'%m-%d-%y'`.tar.gz /home/nick/school
/bin/cp /media/backup/school-backup-* /media/ext-backup
This script removes the previous nights backups and then tar and gzips my directory with my school work. The date is appended to the end of the file name so I know when the backup was created.

You don't have to use rsync for your home directories. You can choose to tar those up as well. I just did that because I wanted an uncompressed backup of my home directory at all times. But you may not care. Remember the nice thing about this is it is completely automatic once you get it setup. I hope this helps.
__________________


Friday, September 26, 2008

How to set up both analog and digital out in Ubuntu


Wanted to get S/Pdif / digital output to my 2 channel DAC, while maintaining my analog output/ line out


First check what your devices are:type in terminal: aplay -l

Result:

**** List of PLAYBACK Hardware Devices ****
card 0: ICH5 [Intel ICH5], device 0: Intel ICH [Intel ICH5]
Subdevices: 1/1
Subdevice #0: subdevice #0
card 0: ICH5 [Intel ICH5], device 4: Intel ICH - IEC958 [Intel ICH5 - IEC958]
Subdevices: 1/1
Subdevice #0: subdevice #0


Note that device 4 is my digital audio device: IEC958.
First I set the sound preferences in System to IEC 958; this made the digital out active.
But no sound anymore on my pc speakers connected to analog audio out or line out.
So I found this suggestion: create in ~/.asoundrc the following code (type in terminal: sudo gedit ~/.asoundrc):
pcm.!default {
type plug
slave.pcm ttable

}

pcm.ana {
type hw
card 0
device 0
}

pcm.digi {
type hw
card 0
device 4
format S16_LE
rate 48000
}

pcm.both {
type multi
slaves {
a {
pcm "digi"
channels 2
}
b {
pcm "ana"
channels 2
}
}
bindings {
0 {
slave a
channel 0
}
1 {
slave a
channel 1
}
2 {
slave b
channel 0
}
3 {
slave b
channel 1
}
}
}

pcm.ttable {
type route
slave.pcm "both"
ttable.0.0 1
ttable.1.1 1
ttable.0.2 1
ttable.1.3 1
}

Note that I set my digital device to 4. It may be 2 or another one in your case.
(source: http://sudan.ubuntuforums.com/showthread.php?t=875268&s=bd8557c7e7f2df6b1627e997a1a82f62&

I had set my sound preferences back to ALSA. So now I had sound on the analog output, but not on the digital output. I installed gnome alsa mixer (via synaptic) and set it to work(applications, multimedia).
And found out that the volume of the ICP958P was zero. Changing that I had sound both analog and digital...


+++++++++++++++++++++++++++++++++++++++++++++++++++


The following was a digression that didn'tlead to a solution for me. But maybe for others:

Found this bug report:


Hardy beta, clean install.

ALSA sees the integrated sound card in my system and its analog and digital outputs, with no problem:

aplay -l
**** List of PLAYBACK Hardware Devices ****
card 0: Intel [HDA Intel], device 0: ALC883 Analog [ALC883 Analog]
Subdevices: 0/1
Subdevice #0: subdevice #0
card 0: Intel [HDA Intel], device 1: ALC883 Digital [ALC883 Digital]
Subdevices: 1/1
Subdevice #0: subdevice #0

However, pulseaudio is only using the Analog output.
Also, pavucontrol only shows the analog output device (ALC883 Analog).

I think this is a bug, there seems to be no way to have pulseaudio output to the digital (s/pdif / ie958) sink.

This: http://www.pulseaudio.org/ticket/139
may have something to do with this.
I followed the instructions:
- added the following line to /etc/pulse/default.pa:
load-module module-alsa-sink device=hw:0,1 ## Card 0, Device 1
- Kill and restart the audio server:
pulseaudio -k
pulseaudio -D

Now the digital output shows up in pavucontrol, and the applications that use pulse also use the digital output. All this shouldn't be needed (output to digital by default) or at least an easier digital output activation is necessary.


sorrce: https://bugs.launchpad.net/ubuntu/+source/pulseaudio/+bug/205717


I tried the above solution. Didn't work for me; got the message connection failed when I tried to activate pavucontrol and no sound on my system and no digital out.


Device 4 or the IEC958 is the digital device; set that in tab Devices as device.

Thursday, September 25, 2008

Windows NTFS Partitions Read/write support made easy in Ubuntu Feisty

This program allow you to easily configure all of your NTFS devices to allow write support via a friendly gui. For that use, it will configure them to use the open source ntfs-3g driver. You’ll also be able to easily disable this feature.

Current Stable 0.5.5

Project Home page :- http://flomertens.free.fr/ntfs-config/

Requirements

windows with Feisty dual-boot installation and external hard drive (Optional)

Install NTFS-config in Ubuntu Feisty

Now You can install NTFS-config from Ubuntu Feisty repositories

sudo apt-get install ntfs-config

This will install all the required packages for ntfs-config including ntfs-3g

Using Ntfs-Config

If you want to open this application go to Applications—>System Tools—>NTFS Configuration Tool

Now it will prompt for root password enter root password and click ok

It will show the available NTFS partition as follows in this example /dev/sda1 in NTFS partition

You need to select the partitions you want to configure,add the name of the mount point and click on apply.In this example i have ticked the check box next to /dev/sda1 and click under mount enter the name you want to use i have entered as windows now the mount point showing as /media/windows and click on apply.

Select the NTFS Write support which is suitable for you i.e internal or external

In this example i have tick the check box next to Enable write support for internal device because i am using dualboot with windows.If you are using external hard drive select external option and click on ok

Once it finished you should see the mount point on your desktop as follows

You can see the windows mount point files as follows

If you want to unmount you should be root to unmount and then right click on mount point select Unmount Volume

APE or Monkey's Audio format playback and burning in Ubuntu

Classified: Ubuntu - Leo @ 6:05 pm
Tags: APE, codec, Monkey's Audio, Ubuntu
source: http://lcardinaals.wordpress.com/2008/08/03/monkeys-audio-formaat-afspelen-in-ubuntu/ Dutch
This no longer necessary is you installed the medibuntu codecs; just try mplayer first!!
"
I'm a big music lover and also download music sometimes, especially in the format FLAC and Monkey's Audio (extension. APE). Both formats are lossless compression methods. Then I put them into the m4a (mp4) format, a lossy compression method. Beautiful small and still good quality. Certainly for the iPod. FLAC is not a problem as this on Ubuntu and Linux is sufficiently supported. Monkey's Audio was a problem, but this is now resolved.

The Monkey's Audio Codec (mac) can be installed through the repository of Morgoth. These should we do first recording as a soft real source:

1. Go to System -> Administration -> Software Sources.
2. In the Software Sources window, click the tab "Third party software."
3. Click the Add button.
4. Fill in APT line: "

deb http://morgoth.free.fr/ubuntu gutsy back-main

and click on the "Add Source" button.
5. Let the Software Sources window even open.
6. Now we go into the authentication key (GNU Privacy Guard key) of Morgoth add, so we APE package can download via the repository, by downloading it here: Morgoth signing key.
7. Click the Authentication tab in the Software Sources window.
8. Click the "Import Key File ... 'button.
_________________
I had a problem with this:another way of doing this:

Import signing key into APT

Signing is available to ensure that you download packages I really made myself You have to download the Morgoth signing key, import it into APT trusted repositories database by issuing the following command in a shell (terminal) :

wget -O - http://morgoth.free.fr/files/morgoth-signkey.gpg.asc | sudo apt-key add

source: http://morgoth.free.fr/ubports/#aptkey

____________________________________

9. Go to the folder where the authentication key is kept (by download) and select morgoth-signkey.gpg.asc and click the OK button.
10. Now click the Close button to the Software Sources window.
11. Go to System -> Administration -> Synaptic package management '
12. In the 'Synaptic Package Manager window, click the Search button in the toolbar.
13. In the Find window fill in the 'Search:' monkey's audio "(without quotes) and click the Search button.
14. In the 'Synaptic Package Manager window, select audio monkeys with the right mouse button and choose "Mark for installation". Accept the install dependencies.
15. Click Apply in the toolbar.
16. Click the Summary window on the Apply button.
17. Click the "Changes made" window on the Close button.
18. Close the 'Synaptic package management' window.

Now the library libmac2 with the Monkey's Audio format can be installed and used in XMMS2, MPlayer, audacious and soundKonverter. Xine gstreamer and have no support. This includes the use of Monkey's Audio so in Amarok, but there have soundKonverter again.

Enjoy the perfect music."


Burn Ape with k3b

APE, Monkey's Audio and Ubuntu
Monkey's audio files (APE and the associated CUE files) are not configured by default to work with Ubuntu's burners (either Gnomebaker or K3B). There are the steps I went through to make it work - just sharing in case anyone else needs to do this:

  1. 1. Install k3b: sudo apt-get install k3b
  2. 2. Get the Monkey's Audio codecs from the KDE-Apps plug ins repository at http://www.k3b.org/download
  3. 3. Install KDE libs: sudo apt-get install kdelibs4-dev
  4. 4. Install Qt libs: sudo apt-get install libqt3-mt-dev. The reason for install qt3 libraries is because it appears that the APE plug ins require it.
  5. You'll need the k3b audio encoders/decoders. So, sudo apt-get install libk3b-dev
  6. And you'll also need to sudo apt-get install libhal-dev. I'm not sure why this is necessary, since this is the hardware abstraction layer, which should be part of the k3b core. Why does the APE codec need this? Guess it doesn't matter why - you just do, dammit
  7. Untar/unzip the monkey's audio plugins from step 2 above. Then run the standard install prcess: ./configure && make && sudo make install like this
  8. The remaining steps are easy (make sure you’re in the k3bmonkeyaudioplugin-3.1 directory when typing in the terminal):

    ./configure
    make
    sudo make install

and <>Configure k3b... ->Plugins, you'll see the Monkey's Audio entry in the codec list.

After this, K3b recognises APEs easily. Start it, click ‘New Audio CD Project’, locate the CUE file in the browser pane and double-click it. You can play the tracks from within K3b and rip the files by clicking the blue arrow button.
http://ubuntuforums.org/showthread.php?t=380394
http://ascending.wordpress.com/2007/02/10/handling-ape-cue-images-with-k3b/

EnvyNG: an easy way to install graphic drivers

What is Envy?:

"Envy" is an application for Ubuntu Linux and Debian written in Python and PyGTK which will:
1) detect the model of your graphic card (only ATI and Nvidia cards are supported) and install the appropriate driver. However automatic detection can be overridden with the "Manual installation"
2) install the right driver for your card and all the required dependencies
3) configure the Xserver for you

Envy features both a GUI (which you can launch only inside a Desktop Environment) and a textual interface which you can use if, for example, you cannot start the Xserver.
see more here:
http://albertomilone.com/nvidia_scripts1.html

WARNING: you will have to remove the driver you installed with Envy before upgrading Debian or Ubuntu to a newer release (e.g. upgrading Ubuntu Edgy to Ubuntu Feisty or Debian Etch to Debian Lenny).

You will have to type the following command:

sudo envy --uninstall-all
[NOTE: This is no longer necessary with EnvyNG]

Wednesday, September 24, 2008

Create backup of all packages using APTonCD in Ubuntu

APTonCD is a tool with a graphical interface which allows you to create one or more CDs or DVDs (you choose the type of media) with all of the packages you’ve downloaded via APT-GET or APTITUDE, creating a removable repository that you can use on other computers.One thing you need to remember this will create backup all the packages installed using apt-get,synaptic because these package arcives are stored in /var/cache/apt/archives

APTonCD will also allow you to automatically create media with all of your .deb packages located in one especific repository, so that you can install them into your computers without the need for an internet conection.

APTonCD Features

Create media with all your downloaded packages;

Create media with all packages from an especific repository

Download all official Ubuntu repositories (main,restricted,universe and multiverse) into removable media (CD/DVD);

Perform backup/restore all packages installed via apt;

Install, with the same CD/DVD, the same programs into several different machines;

http://www.debianadmin.com/create-backup-of-all-packages-using-aptoncd-in-ubuntu.html

See also
http://en.wikipedia.org/wiki/Remastersys

Remastersys is a free and open source script for Linux distributions that can:

  • Create a customized Live CD/DVD (a remaster) of Ubuntu and derivatives.
  • Backup all the system, including user data to an installable Live CD/DVD.
  • History

    It was initially created to be able to easily backup or create a distributable copy of an Ubuntu or derivative installation. Inspiration for this tool came from the mklivecd script that Mandriva uses and the remasterme script that is in PCLinuxOS. Since those scripts are not very easy to port to Ubuntu, it was written from scratch.

    Uses

    It is a very useful and easy way to create a customized Live CD/DVD version of Ubuntu, once the system is installed and configured with programs, updates, etc... the user just has to:

  • Download and install the latest version of Remastersys from: http://remastersys.klikit-linux.com/repository/remastersys/
  • Open the program (a shortcut is created on the desktop) and then choose the dist or backup option, and then the iso of the Live CD will be automatically created.

The resulting iso can also be installed on a USB pendrive, creating a Live USB distro, using either a command-line approach[2] or a graphical tool such as UNetbootin.

It has a command line version and a GUI version. It currently works with Ubuntu, and possibly more Ubuntu-based distributions.
The latest version of Ubuntu (8.04) is already supported [3]

Known problems

  • A Live CD/DVD created from a system with installed proprietary ATI or Nvidia drivers, when booted, will not load these drivers because casper (the ubuntu Live CD boot routine) disables ati and nvidia proprietary drivers. [4]
  • When running from a Wubi installation, Remastersys requires that the working directory have sufficient space. This may require the user to have a large virtual disk size or to change their working directory.[
save

Tuesday, September 23, 2008

AptURL Protocol Handler install via a weblink

The AptURL Protocol Handler is a program that handles special URLs for installing packages. This means that special links in web pages can install software. Ubuntu 7.10 already has AptURL installed by default. Installing applications does not get any easier than this:

apt linkClick here to install the gweled game.

AptURL

AptURL should be compatible with most browsers on Ubuntu, I tested it with Firefox and Epiphany and it worked fine.

Want to make your own AptURLs? The format is simple: apt:packagename.

Ubuntu 8.04 W2L final released made for Probleemloos Overstappen 2 e Editie

The Ubuntu 8.04 W2L edition has been build to accompany the second edition of Probleemloos overstappen op Linux, a Dutch book about migrating to Linux. The Ubuntu DVD aims at providing a panoramic overview of what Ubuntu has to offer as to desktop environments and a wide range of applications for audio, video, graphics, office, networking, software development, security and some games to waste time. As such it isn’t a new version of Ubuntu, but simply a fattened version of the original cd. Thus, it is also an easy install for software gluttons ;-).

Using Reconstructor the vanilla Ubuntu 8.04.1 disk has been extended with:

1. Kubuntu, Xubuntu, Edubuntu and UbuntuStudio (though without the rt kernel),
2. the software repositories of Medibuntu, Google, PlayOnLinux and Remastersys, and
3. the following list of packages (a straightforward sudo apt-get install):

ubuntu-restricted-extras sun-java6-jre sun-java6-plugin non-free-codecs mozilla-plugin-vlc mozilla-mplayer gnochm deskscribe easycrypt emacs gdesklets isomaster kiso kitchensync kmobiletools kpilot krusader multisync putty qemulator qink rar rsibreak spamassassin unison qemu-launcher zim celestia childsplay earth3d littlewizard stellarium dfo flickrfs gpsdrive kflickr pdfedit rawstudio ufraw xpdf googleearth prism-google-calendar prism-google-docs prism-google-groups prism-google-mail prism-google-reader prism-google-talk amaya amsn amule aria azureus blam gnome-blog blogtk linuxdcpp drivel emesene etherape prism-facebook prism-twitter prismstumbler filezilla firestarter gtwitter gwget idjc kmess knode logjam nzb pan seamonkey straw ttb xchat fbreader eqonomize glom gnucash gramps grisbi homebank koffice labyrinth openclipart semantik taskjuggler wine gnome-art gshare gtweakui workrave anjuta bluefish eclipse jedit kdevelop netbeans quanta freemind scite acidrip banshee bmpx easytag exaile vlc streamtuner noatun miro lastfm kstreamripper juk compizconfig-settings-manager compiz-kde dosemu gparted hubackup inkblot qgrubeditor kgrubeditor qtemu sbackup pysdm virtualbox-ose virtualbox-ose-modules-generic criawips istanbul yakuake p7zip seamonkey-chatzilla xaralx gtk-recordmydesktop krecordmydesktop recordmydesktop pitivi amarok likewise-open likewise-open-gui b43-fwcutter bcm43xx-fwcutter sun-java6-plugin wink kompozer vim-common vim-doc kmymoney2 remastersys avscan clamav clamav-freshclam clamtk klamav encfs cryptkeeper easycrypt rkhunter chkrootkit tripwire nmap nessus nessus-plugins nessusd zenmap playonlinux abiword-plugins displayconfig-gtk acroread acroread-escript acroread-plugins mozilla-acroread celestia-gnome celestia-kde language-pack-nl language-pack-nl-base language-pack-gnome-nl language-pack-gnome-nl-base language-support-nl language-support-translations-nl language-pack-kde-nl language-pack-kde-nl-base koffice-i18n-nl mozilla-firefox-locale-nl-nl thunderbird opera skype 3dchess adonthell adonthell-data boson boson-data circuslinux circuslinux-data extremetuxracer extremetuxracer-data frozen-bubble frozen-bubble-data hedgewars hedgewars-data lincity-ng lincity-ng-data planetpenguin-racer planetpenguin-racer-data planetpenguin-racer-extras supertux supertux-data supertux-data-stable supertuxkart-data torcs torcs-data torcs-data-cars torcs-data-tracks warzone2100 warzone2100-data wesnoth wesnoth-all gbrainy gnudoq neverball pingus warsow warsow-data warsow-server alien-arena alien-arena-data alien-arena-server sauerbraten sauerbraten-data sauerbraten-server

The book will go to market in the first week of October 2008. This is the disk that will accompany the book. It can be downloaded via bittorrent from LinuxTracker.


See also:
http://www.ruminationsonthedigitalrealm.org/ubuntu-what-is-it-some-different-viewpoints

Monday, September 22, 2008

Changing Time of day wallpaper in Ubuntu

http://lifehacker.com/400505/rotate-desktop-backgrounds-in-ubuntu

Dawn of Ubuntu wallpaper slideshow for Hardy
A neat feature that was quietly added to GNOME 2.22 is time-lapsed backgrounds; essentially a nice slideshow for your background image. Works best with very long transitions and very few keyframes.

This immediately had me thinking about the Dawn of Ubuntu wallpaper, and its two variants Night of Ubuntu and Ubuntu Spring. I popped them together into a little slideshow, and am quite pleased with the results

http://dylanmccall.googlepages.com/D...ideshow.tar.gz

This slideshow ("Day of Ubuntu") gradually changes over time, continually providing a unique view that perfectly reflects the time of day!

Unfortunately, the images cannot use relative paths at the moment, so you have to place them as directed. Copy day_of_ubuntu to /usr/share/backgrounds (sudo cp day_of_ubuntu /user/share/backgrounds/day_of_ubuntu), then add day_of_ubuntu.xml as a wallpaper.
Read Readme for more information.

(Also unfortunately, it seems that I must set an arbitrary day, month and year, which means that the slideshow gets messed up over time).

http://ubuntuforums.org/showthread.php?t=784881

Hardy USB keyboard freezes (Not solved)

Fact is that I've never had so many freezes with Xp as with Hardy the last two months.
This is really bad. I think instead of hunting at the most eye candy the foremost aim of the distro developers should be stability + hardware support+ gui interfaces where possible to win over the former M$ users.
Don't understand me wrong: Linux has won me over for a multiple numbers of reasons. But I want it to win on a broader scale. I have a friend who is not interested in software; he is interested in doing stuff with his pc. I can't talk him in to Linux as it is now and damn, how sorry I feel about that!!

The most hangups are from using the restricted driver; see this post:
http://stillstup.blogspot.com/search?q=ati

But as you can read below there are a number of reasons it can happen to you.

Case 1:
I have some freeze problems that are described here:
In my case, I have worked with various combinations of PS/2 and USB mice/keyboards. I usually work with a USB keyboard and mouse and a PS/2 port-attached mousepad. When the freezes occurred initially, it would behave similarly to what is described above, with the system continuing to run, but unresponsive to keyboard (USB) events and mouse (USB) clicks, although usually the mouse movement was still detected and the cursor moved about. Interestingly, the mousepad on the PS/2 port continued to function, and if I plugged a PS/2 type keyboard into the machine, it would work too, enabling me to regain control of the crippled machine.
Italics descibe my situation

And:
2
Randomly the desktop freezes, mouse moves but I can't ctrl+alt+backspace or ctrl+alt+f1 although pc is pingable from the network and seems alive. The freeze usually seems to happen when there is heavy load.

And:
3

Hello

I've fixed compiz for HH on my laptop, i show how hoping it serves for someone.

1.- compiz worked fine on my laptop with ubuntu 7.10, it started to freeze when i upgrade to 8.04
2.- once it freezes i had to shutdown with Alt-Prnt+RSEIUB. switch to console or restart X was impossible.
3.- if it freezes once, it was more 'likely' tp freeze again until it hang every time i rotated cube or even with screen saver (it's 3D)

point 3 improved if i deleted .compiz in folders /home and /.config and then ctrl-alt-bcksp, however it freezed 1 out of 3 or 4.
at last i realized that the ubuntu logo and the progress bar at start up had disappeared too, so i fix it with startup manager and put screen resolution at 1024x768, 16 bits, because it was at 640xsomething. i don't know why or how but since then (3 days ago) i've had no problem, although i've tested compiz effects trying to provoke a freeze.

https://bugs.launchpad.net/ubuntu/+source/compiz/+bug/186058

Important clue: The liveCD does not have this problem!

suggested solutions:
I restarted X by using the Alt-Sysreq-K combination.

2
It would help to open a terminal and run top. Watch the CPU activity. Also add a CPU monitor to your panel--Right-Click--Add on the panel. See if the keyboard freeze is linked to 100% CPU usage. Also note what program is running and eating up your CPU.
3 When your keyboard is frozen, how do you shutdown? If you have access to another computer, install openssh-server and login via ssh so you have a remote connection to your laptop from another machine. Then when you keyboard freezes, go to the remote machine and examine the some log files.

Install openssh-server: (laptop)

>sudo apt-get install openssh-server

On the remote machine

>ssh graymalkin@gramalkin-laptop

or

>ssh graymalkin@192.168.1.10 (whatever your IP address for the laptop is: ifconfig to find out)

Use this remote terminal to examine messages

>dmesg | tail

Look for errors in mouse or keyboard or I/O or network.

To shut down the laptop remotely (you want to avoid using the power button to shutdown if possible)

>sudo poweroff
( https://bugs.launchpad.net/ubuntu/+bug/196902)

addition:
I've setted poweroff using power button into gnome power management

Sunday, September 21, 2008

Move home to a new, its own partition

Having the “/home” directory tree on it’s own partition has several advantages, the biggest perhaps being that you can reinstall the OS (or even a different distro of Linux) without losing all your data. You can do this by keeping the /home partition unchanged and reinstalling the OS which goes in the “/” (root) directory, which can be on a seperate partition.

But you, like me, did not know this when you first installed Ubuntu, and have not created a new partition for “/home” when you first installed Ubuntu. Despair not, it is really simple to move “/home” to its own partition.

First, create a partition of sufficient size for your “/home” directory. You may have to use that new hard drive, or adjust/resize the existing partition on your current hard-drive to do this. Let me skip those details.

Next, mount the new partition:
$mkdir /mnt/newhome
$sudo mount -t ext3 /dev/hda5 /mnt/newhome
(You have to change the “hda5″ in the above to the correct partition label for the new partition. Also, the above assumes that the new partition you created is formatted as an ext3 partition. Change the “ext3″ to whatever filesystem the drive is formatted to.)

Now, Copy files over:
Since the “/home” directory will have hardlinks, softlinks, files and nested directories, a regular copy (cp) may not do the job completely. Therefore, we use something we learn from the Debian archiving guide:
$cd /home/
$find . -depth -print0 | cpio --null --sparse -pvd /mnt/newhome/

Note -- before the null and parse and one - before pvd; this is an error on the source page

Make sure everything copied over correctly. You might have to do some tweaking and honing to make sure you get it all right, just in case.

Next, unmount the new partition:
$sudo umount /mnt/newhome

Make way for the new “home”
$sudo mv /home /old_home

Since we moved /home to /old_home, there is no longer a /home directory. So first we should recreate a new /home by:
sudo mkdir /home

Mount the new home:
$sudo mount /dev/hda5 /home
(Again, you have to change “hda5″ to whatever the new partition’s label is.)

Cursorily verify that everything works right.

Now, you have to tell Ubuntu to mount your new home when you boot. Add a line to the “/etc/fstab” file that looks like the following:

/dev/hda5 /home ext3 nodev,nosuid 0 2
(Here, change the partition label “hda5″ to the label of the new partition, and you may have to change “ext3″ to whatever filesystem you chose for your new “home”)

Once all this is done, and everything works fine, you can delete the “/old_home” directory by using:
$sudo rm -r /old_home

source:
http://ubuntu.wordpress.com/2006/01/29/move-home-to-its-own-partition/

--------------------------

Comment:
I had a freeze up halfway this operation.It happened when I wanted to do this: sudo mkdir /home
I had to do a cold reboot and wasn't able to login. I decided to solve this situation by running the livecd. I t would have been better to login in in a failsafe terminal session and do the necessary changes.
User folder can't have root permissions
When I tried to boot I got fault messages that the home folder wasn't writeable; and that its permissions were wrong (root).
In a failsafe terminal session I did:
sudo chown user:group /home/user -R


As is Ubuntu the group name is the same as the group name, it was:
sudo chown pablo:pablo /home/pablo -R

Reinstall your setup in a breeze

What do you like most about having a package manager handle all
your software? Arguably the top two features people most
commonly cite are the ease of installing new software and the
automatic patching, but one of my favourites is the ability to dump
your software selection to a file then read that back in later. In fact,
as a heavy user of virtual machines across multiple PCs, being
able to have a standard list of software I want installed means I
don’t ever find I’m missing a program at an inconvenient time
because each PC has the same software installed!
In APT, this magical superpower is called dpkg --get-
selections. It reads all the software you have installed, and prints
it all to the screen. For example:
dpkg --get-selections > software

That will save your installed list to a file called software. That list is
every piece of software required to reproduce the state your PC is
currently in. So, if you have a backup of your documents (such as
your /home directory), that plus this software list is all you need
to do a full backup and restore. Yes, I realise that many Windows
users think they need to back up their entire C:\ drive to be safe,
but we don’t have that problem on Linux because everything in
/bin, /sbin /usr and the like all comes through the package
manager, so we can let it do the work of remembering which files

Now, it’s one thing being able to save the list of software, but you
also need to be able to restore that list. For that you need the twin
brother of --get-selections, which is (you guessed it!)
--set-selections. This reads package data one line at a time, so you
need to pipe in the contents of pkglist like this:
dpkg --set-selections

That sets your software selections, but doesn’t actually install
anything. For that you need to run a special apt-get command
that translates as “look at the list of software we should have
i nstalled, and compare that against the software we actually have
installed, then make the necessary changes”:
apt-get dselect-upgrade

Any software listed in your selections that isn’t currently
installed will be installed now, so go and make some coffee..

Saturday, September 20, 2008

No Progress Bar at System Startup due to monitor settings


I had a very annoying problem with the startup progress bar that wasn't showing at system boot (Ubuntu).
With the live cd no such problem, so it had to be a configuration error. Installed the startup manager with
sudo apt get install startupmanager
Then I made sure the login screen had a 8 bits 640x480 resolution. Other resolution didn't deliver on my IIyama E1900S.
Edited the xorg.conf file with
Section "Monitor"
Identifier "Configured Monitor"
HorizSync 30-80
VertRefresh 56-75
EndSection
First backup of the file and use a user switch to determine if your new settings work.
These settings are specific for my Iiyama: HorizSync 30-80; VertRefresh 56-75.
Try to determine the configuration of your monitor through documentation or internet.

How to proceed?
Example:
1. Make a backup copy of the current xorg.conf (ALWAYS DO THIS!):
Code:
sudo cp /etc/X11/xorg.conf /etc/X11/xorg.conf.known-to-work
2. Alter xorg.conf in any appropriate way*. (Maybe run "dpkg-reconfigure xserver-xorg" to fix that missing resolution?)
3. Choose System -> Quit -> Switch User

A new X session will start on a second display, and you can now switch between them using the combination Ctrl + Alt + F7 to F12. (Normally, the default X session will be available on Ctrl + Alt + F7, and the second you start will be on Ctrl + Alt + F9)

If you are thrown back into your original session when attempting this - your new xorg.conf probably has an error in it! Check /var/log/Xorg.*.log (usually Xorg.20.log for this second display), and don't forget to restore your backup configuration before rebooting!

Backup Xorg.conf file:
sudo cp /etc/X11/xorg.conf /etc/X11/xorg.conf_backup

Go to folder and file with root privileges for example in Ubuntu:
sudo gedit /etc/X11/xorg.conf


source:
HOWTO: YES! There IS an easy way of trying out Xorg.conf without reloading X
http://ubuntuforums.org/showthread.php?p=4211618


Other resolution/monitor problems:
https://help.ubuntu.com/community/FixVideoResolutionHowto

Problems with the login screen??

Workaround (works for me cause I'm single user):
"Alt-Ctrl-F2" , "Login" by Textmode. "sudo rm /tmp/.X0-lock" , "startx" then it starts up OK, after that I "Enabled Automatic Login", under "System-->Administration-->Login Window-->Safety..."

This can be a solution to this bug:

Binary package hint: gdm

I have previously installed Ubuntu 8.04beta On a Kingston Traveller 8GB stick, with success. After upgrade the screen go blank after Login from GDM. Then i tried to make a fresh installation with Ubuntu 8.04 RC and 8.04 (from yesterday) with the same result...

Wajig

Wajig is a simplified front end to Debian's package management tools including dpkg and APT. Wajig provides the functionality of apt-get, dpkg, dpkg-deb, apt-cache, and other tools, by launching these tools as a subprocess. Wajig also provides extra functionality beyond that of the stock apt and dpkg tools, for example, the command wajig sizes provides a listing of all installed packages and the amount of disk space they require, from smallest to largest.

The key reason to use wajig is that it provides a consistent and intuitive interface to all packaging commands instead of the eclectic mix of incantations used by apt/dpkg. Under the surface wajig maps commands to the appropriate apt/dpkg commands. wajig nicely brings an orthogonal or intuitive quality to the user interface.


Think of wajig as the harmonizer of apt commands

Moving from RedHat to Debian requires learning a new package system. If you only live in the GUI world, the synaptic package will do most anything you will want. Some of us have to administer systems over a command line interface and that poses a small problem.

While the debian apt/dpkg system is better than rpm, the command line interface can be confusing and lacks an Orthogonal or intuitive quality to the user interface. Thankfully, there is a package, called wajig, that cures that problem and more. Wajig is well worth any Debian command line users time to learn - if you don't you will spend even more time in man pages. You will also love the fact that it logs what you do so you have a trail of bread crumbs to back track with if you install something that breaks things.

The following table assumes that you have your /etc/apt/sources files and an /etc/apt/preference file that has your system pinned to the appropriate release. There are ways to override the release level (stable/testing/unstable), but that is not covered here. It is also assumed that you have wajig installed (apt-get install wajig). Once installed you won't want to run apt-get again!

One slick trick - suppose you want to install all the packages on one system to a new system? Do:

wajig listinstalled > installed.txt

move the installed.txt file to the new machine and:

wajig fileinstall installed.txt

Command Function comments wajig command
Equivalent Debian
Apt-get
or dpkg command
Redhat RPM command
Install a package

In Debian there is no reason to manually download a package - apt-get takes care of that for you

wajig install jpilot

or to specify version number

wajig install jpilot=0.99.2

or to specify stable/testing/unstable

wajig install jpilot/testing

apt-get install jpilot rpm -hiv jpilot-0.99.2-1.i386.rpm
Get basic package information wajig detail jpilot
wajig what-is jpilot
what-is is oneline description
dpkg -s jpilot rpm -qi jpilot
List all files in a package wajig listfiles rsync dpkg -L rsync rpm -ql rsync
What package owns this file? wajig whichpkg /bin/rsync dpkg -S /bin/rsync rpm -qf /usr/bin/rsync
Remove a package wajig remove rsync
apt-get remove rsync rpm -e rsync
List all packages
wajig list-names dpkg -l
rpm -qa
Find package based on partial string
wajig status-search rsync dpkg -l 'rsync*'
grep rsync
update system wajig dailyupdate apt-get update
apt-get upgrade
up2date -uv
Start, stop restart daemons wajig start sshd

wajig stop sshd

wajig restart sshd


services sshd start

services sshd stop

services sshd restart

[edit] wajig

wajig has three listing of documentation for its commands:

  • wajig help gives a very short list
  • wajig list-commands Has a oneliner for each command
  • wagig doc Provides some indepth information

Below is a table with the current one liner list - I would advise doing a "wajig doc >wajig_docs" and printing it out to read at night as you will want to become familiar with it I've marked the most important commands in red - somewhat important in bold and you will find a favorite in what is left over.

If you are looking for a package name and only can think of a string try wajig listall |grep string. (there will soon be a fix so you can add an argument to listall).

If you want to know the package some command in your path is from, replace command with the command you are looking for -- try:

wajig whichpkg `which command'

Command Description
addcdrom Add a CD-ROM to the list of available sources of packages
auto-clean Remove superseded deb files from the download cache
auto-download Do an update followed by a download of all updated packages
available List versions of packages available for installation
bug Check reported bugs in package using the Debian Bug Tacker
build Retrieve/unpack sources and build .deb for the named packages
build-depend Retrieve packages required to build listed packages
changelog Retrieve latest changelog for the package
clean Remove all deb files from the download cache
commands List all the wajig commands and one line descriptions for each
daily-upgrade Perform an update then a dist-upgrade
dependents List of packages which depend on the specified package
describe One line description of packages (-v and -vv for more detail)
describe-new One line description of new packages
detail Provide a detailed description of package (describe -vv)
detail-new Provide a detailed description of new packages (describe -vv)
dist-upgrade Upgrade to new distribution (installed and new rqd packages)
docs Detailed help listing for wajig
download Download package files ready for an install
edit Edit any file that root can edit
edit-sources Edit the sources.list file which locates Debian archives
file-download Download packages listed in file ready for an install
file-install Install packages listed in a file
find-file Search for a file within installed packages
find-pkg Search for an unofficial Debian package at apt-get.org
fix-configure Perform dpkg --configure -a (to fix interrupted configure)
fix-install Perform apt-get -f install (to fix broken dependencies)
fix-missing Perform apt-get --fix-missing upgrade
force Install packages and ignore file overwrites and depends
help Print documentation (detail depends on --verbose)
hold Place listed packages on hold so they are not upgraded
init Initialize or reset the wajig archive files
install Install (or upgrade) one or more packages or .deb files
install-r Install package and associated recommended packages
install-rs Install package and recommended and suggested packages
install-s Install package and associated suggested packages
install/dist Install packages from specified distribution (i.e. install/stable)
integrity Check the integrity of installed packages (through checksums)
large List size of all large (>10MB) installed packages
last-update Identify when an update was last performed
list List the status and description of installed packages
list-all List a one line description of every known package
list-alts List the objects that can have alternatives configured
list-cache List the contents of the download cache
list-commands
or
commands
List all the wajig commands and one line descriptions for each
list-daemons List the daemons that wajig can start/stop/restart
list-files List the files that are supplied by the named package
list-installed List packages (with optional argument sub-string) installed
list-names List all known packages or those containing supplied string
list-orphans List libraries not required by any installed package
local-dist-upgrade Dist-upgrade using packages already downloaded.
local-upgrade Upgrade using packages already downloaded, but not any others
move Move packages in the download cache to a local Debian mirror
new List packages that became available since last update
news Obtain the latest news about the package
new-upgrades List packages newly available for upgrading
orphans List libraries not required by any installed package
package Generate a .deb file for an installed package
policy Gets package versions for different release versions testing/stable
purge Remove one or more packages and configuration files
purge-depend Purge package and those it depend on and not required by others
purge-orphans Purge orphaned libraries (not required by installed packages)
recommended Install package and associated recommended packages
reconfigure Reconfigure the named installed packages or run gkdebconf
reinstall Reinstall each of the named packages
reload Reload daemon configs, e.g., gdm, apache (see list-daemons)
remove Remove one or more packages (see also purge)
remove-depend Remove package and those it depend on and not required by others
remove-orphans Remove orphaned libraries (not required by installed packages)
repackage Generate a .deb file for an installed package
reset Initialise or reset the wajig archive files
restart Stop then start a daemon, e.g., gdm, apache (see list-daemons)
rpm2deb Convert a RedHat .rpm file to a Debian .deb file
rpminstall Install a RedHat .rpm package
rpmtodeb Convert a RedHat .rpm file to a Debian .deb file
search Search for packages containing listed words
show Provide a detailed description of package [same as detail]
showdistupgrade Trace the steps that a dist-upgrade would perform
showinstall Trace the steps that an install would perform
showremove Trace the steps that a remove would perform
showupgrade Trace the steps that an upgrade would perform
size Print out the size (in K) of all, or listed, installed packages
sizes Print out the size (in K) of all, or listed, installed packages
source Retrieve and unpack sources for the named packages
start Start a daemon, e.g., gdm, apache (see list-daemons)
status Show the version and available version of packages
status-match Show the version and available version of matching packages
status-search Show the version and available version of matching packages
stop Stop a daemon, e.g., gdm, apache (see list-daemons)
suggested Install package and associated suggested packages
toupgrade List packages with newer versions available for upgrading
unhold Remove listed packages from hold so they are again upgraded
unofficial Search for an unofficial Debian package at apt-get.org
update Update the list of downloadable packages
update-alts Update default alternative for things like x-window-manager
upgrade Upgrade all of the installed packages or just those listed
whatis A synonym for describe
whichpkg Find the package that supplies the given command or file
Command line options

Upgrade To a Fresh Feisty Install


Please note - This method is intended for those wishing to perform a fresh install of Feisty but maintain their user data and installed applications.

  1. You may wish to make a back up of your current installation. One option is with partimage.

  2. You can preserve you user data and personal settings if you use a separate home partition. If you do not currently do not have a separate home partition you can easily create one.

  3. Create a lists of your currently installed packages.
    •   dpkg --get-selections | grep -v deinstall > ubuntu-packages
      Note: That is two - - in front of "get-selections" with no space.
  4. Save this file ubuntu-packages on an external media (usb/floppy/cd).

  5. Download and install Feisty. If you have a separate /home partition, mount it at /home DO NOT FORMAT IT.

  6. Copy ubuntu-packages from your external media back to your home directory.

  7. Restore your packages. First enable your repositories. Then, in a terminal,
    •   sudo aptitude update
      sudo dpkg --set-selections < ubuntu-packages
      sudo dselect
    Note: That is two - - in front of "set-selections" with no space.
viola

source:
https://help.ubuntu.com/community/FeistyUpgradesFreshInstall?highlight=(install)|(fresh)

How to add a new user form the terminal/ recoverymode

Boot in to recovery mode (select the option when GRUB loads before the Ubuntu splash screen). From there:
Code:
useradd -m <user_name>
passwd <user_name>
Will create the new user, their home dir and set the password

Wednesday, September 17, 2008

Install Ati driver

Forget what's below: Use Envy

http://lunapark6.com/envy-easy-way-to-install-nvidia-drivers-in-ubuntu.html

One of the first questions Linux users often ask, after installing their distro of choice, is “How do I install Nvidia drivers?” Although the process has been hit and miss in the past, one of the best solutions that I have come across is Envy for the Ubuntu distribution. The process is breathtakingly easy and works like a charm everytime. Since version 0.8.1 Envy now installs Ati drivers as well as Nvidia. The process is as easy as :

wget http://albertomilone.com/ubuntu/nvidia/scripts/
envy_0.8.1-0ubuntu6_all.deb

sudo dpkg -i envy_0.8.1-0ubuntu6_all.deb


You will find it in Applications, System Tools


source: http://wiki.cchtml.com/index.php/Ubuntu_Hardy_Installation_Guide

Method 2: Manual Method (installing Catalyst 8.8)

wget https://a248.e.akamai.net/f/674/9206/0/www2.ati.com/drivers/linux/ati-driver-installer-8-8-x86.x86_64.run

(this installer is for 32bit and 64bit systems)

[edit] Follow These Instructions Carefully

If you are using the x86_64 architecture (64 bit), be sure to inst "ia32-libs" before proceeding!


Make sure universe and multiverse are enabled in your repository sources.


Switch to the directory you downloaded the installer to.


sudo apt-get update
sudo apt-get install build-essential cdbs fakeroot dh-make debhelper debconf libstdc++5 dkms linux-headers-$(uname -r)

(package cdbs is required starting with Catalyst 8.8). On my machine it was installed during the package build process following the below command.

Now use the following command to create the .deb files you will be using for installation:

sh ati-driver-installer-8-8-x86.x86_64.run --buildpkg Ubuntu/hardy

If that command does not work, download the driver itself from the official site (ati.com) and move it to your home folder (/home/)

Now we have to blacklist the driver in Ubuntu's repository, so that the new driver will be used.

sudo gedit /etc/default/linux-restricted-modules-common

Add "fglrx" to the line "DISABLED_MODULES"

File: /etc/default/linux-restricted-modules-common
DISABLED_MODULES="fglrx"

Please note that after the modification above, the "Restricted Driver Manager" will signal "ATI accelerated graphics driver" not enabled (unticked). This is perfectly correct. At the end of the installation procedure it will signal in Status: "in use" (green light), but NOT enabled. It simply means that the fglrx module contained in the linux-restricted-modules package is not enabled, but another fglrx module (8.8) is in use.

You may also need to edit the file(s) (if they exist):

sudo gedit /etc/modprobe.d/blacklist-restricted
sudo gedit /etc/modprobe.d/blacklist-local

Put a # in front of the line "blacklist fglrx", if it is present. Otherwise, the kernel module will not load automatically, and you will not get 3D acceleration.

Install .debs. If there are no other versions of the driver in the same folder, you can save yourself some typing work:

sudo dpkg -i xorg-driver-fglrx_*.deb fglrx-kernel-source_*.deb fglrx-amdcccle_*.deb

Otherwise, do not use wildcards. You can use this methode in any case.

sudo dpkg -i xorg-driver-fglrx_8.522-0ubuntu1_i386.deb fglrx-kernel-source_8.522-0ubuntu1_i386.deb fglrx-amdcccle_8.522-0ubuntu1_i386.deb

[edit] Additional 64-bit instructions

If you have a 64 bit install, the above dpkg command may complain that "Errors were encountered while processing: fglrx-amdcccle". This is because of a dependency of the amdccle package on 32 bit libraries. If you receive this error, issue the following command after the above dpkg command, which will force the installation of all of the 32 bit dependencies, and then the amdccle package:

sudo apt-get install -f

Catalyst 8.8 on 64-bit systems requires the --force-overwrite command in the above dpkg command:

sudo dpkg -i --force-overwrite xorg-driver-fglrx_8.522*.deb fglrx-kernel-source_8.522-0*.deb fglrx-amdcccle_8.522-0*.deb

When installing the packages, if xorg-driver-fglrx_8.522 fails to install due to a diverted file conflict, you can fix the package with this procedure.

[edit] Fix for an error:

If you are having this error:

dpkg-shlibdeps: failure: couldn't find library libfglrx_gamma.so.1 needed by debian/xorg-driver-fglrx/usr/bin/fglrx_xgamma (its RPATH is '').

Fix it by doing the following:

sudo sh ati-driver-installer-8-7-x86.x86_64.run --extract driver
cd driver/arch/x86_64/usr/X11R6/lib64
sudo ln -s libfglrx_gamma.so.1.0 libfglrx_gamma.so.1
cd ../../../../../
sudo sh ati-installer.sh -- --buildpkg Ubuntu/hardy

[edit] Finishing the Install: Configuration

If you've used fglrx previously, you will not need to do this.

Now you'll have to edit your xorg.conf

sudo gedit /etc/X11/xorg.conf

and add the following line to the Device section (if it does not already exist). Include the following lines without [...]:

Section "Device"
[...]
Driver "fglrx"
[...]
EndSection

Save and exit, then run

sudo aticonfig --initial -f

in a terminal. If it does not error you should be fine.

Some people find that changes to xorg.conf don't get used by the driver. To force the ati driver to adopt changes made to xorg.conf, type the following command:

sudo aticonfig --input=/etc/X11/xorg.conf --tls=1

Finally, reboot the computer and type

fglrxinfo

into the terminal. If the vendor string contains ATI, you have installed the driver successfully. Release 8.8 looks like:

display: :0.0  screen: 0
OpenGL vendor string: ATI Technologies Inc.
OpenGL renderer string: Radeon X1950 Series
OpenGL version string: 2.1.7873 Release


Please note: Depending on the particular ATI card that you own, you may or may not automatically have all of the relevant driver features enabled. R500 and R600 cards (X1xxx, HD series, and newer) in particular will need TexturedVideo enabled in Xorg.conf (rather than the traditional VideoOverlay) in order to support Xv accelerated video playback.

[edit]

Open every folder in terminal (right click)

Install via synaptic
nautilus-open-terminal

Sunday, September 14, 2008

Capturing analog video

source:(+video): http://nl.youtube.com/watch?v=dDLtHDvQ7O4
Thought I'd share my good fortune - I know I'm not alone in trying to figure out how to capture from an analog capture device in LINUX, and "How-Tos" in LINUX are fairly lacking on YouTube. Here are some command lines I've pieced together to capture - 2 for a TV card and 1 for USB Webcam. The tutorial will hopefully give you an idea on how to tweak them for your own use. As needs arise for my own further tweaking, maybe I'll post some modifications! Here they are, for your enjoyment. To use, just open a console where you want to save the video file, cut and paste, change the name of the file to what you want and add any other tweaks, and you're ready.

MPlayer/mencoder:
http://www.mplayerhq.hu

High Quality:
mencoder -ovc lavc -lavcopts vcodec=mpeg4:\vhq:vbitrate=6000 -oac mp3lame -lameopts br=256: -ffourcc DIVX -tv driver=v4l:norm=ntsc:input=1:adevice=/de v/dsp:width=640:height=480 -af volume=-10 -o ****.avi tv://

Web Quality:
mencoder -oac mp3lame -ovc lavc -lameopts mode=1:vbr=2:q=4 -lavcopts vcodec=mpeg4 -tv driver=v4l:norm=ntsc:input=1:adevice=/de v/dsp:width=640:height=480 -af volume=-10 -o ****.avi tv://

Webcam:
mencoder tv:// -tv driver=v4l:width=320:height=240:device=/ dev/video1:forceaudio:adevice=/dev/dsp -ovc lavc -oac mp3lame -lameopts cbr:br=64:mode=3 -o ****.avi

Getting Started in Cinelerra:
http://www.billauer.co.il/cinelerra-v...

This video was captured entirely in analog, entirely on my webcams, and entirely in LINUX (my first!) This is my third video using Cinelerra... hopefully no one noticed the difference!

Saturday, September 13, 2008

Create symbolic link in a grafical way

Open Nautilus as root.
(Go into your terminal and type:

Quote:
gksudo nautilus
or make a launcher with gksudo nautilus )
Go to folder or file; right click and make link and copy that to desktop or pane.

Where did all my disk space go? The hidden folder .root/.local/share/Trash

I could not explain that my hard disk was so full considering the files I had on it. Trashcan was emptied ten times. Did all the cleaning I could think of (see post before this one) but still found it unexplainable where the space went to. The Gnome Disk manager didn't provide the right answer. I installed the program xdiskusage. First I ran it and discovered some ten gig in the root but access denied; so I could not find out what it was. So ran it in the terminal: sudo xdiskusage . Then I discovered that these 10 gig where in the folder root/.local/share/Trash. Went there in Nautilus as root and unhid the local folder with Ctrl+H.
Tried to delete the files but after a short disappearance the files were recovered.These were mostly large incremental backup files that I had decided I wanted on an external hard drive and had deleted. Made with sbackup.
Anyway looked in the forums and found this suggestion:

In Hardy, the location of the trash has changed to
Code:
~/.local/share/Trash/files
To empty the trash this command should do it:
Hardy Heron:
Code:
Code:
sudo rm -fr ~/.local/share/Trash/files/*
Tried this but it didn't work out as it should. The files were still there.
Elswhere I found this:
Since it is a directory, you cannot just
rm /root/.local/share/Trash/files

You need to rm -rf /root/.local/share/Trash/files

I tried and finally I had ten more gig at my disposal.
But this raises some questions... how is it possible that there are two Trash locations and that one is hardly accessible for the common user? And how should he discover there are two trash locations? This is very confusing and this matter should be adressed in some way or the other. As many people use Ubuntu as a dual boot and may haved limited space to run the OS.

Update:

Again there was a load of files (ten gig) in the /home partition in folder Trash-0 outside user pablo and second user test. Because evidently not linked to a single user, I couldn't remove them using Nautilus or Krusader as root.
Only way to solve this to type in terminal
sudo rm -rf /home/.Trash-0/files


Friday, September 12, 2008

Handle (nearly) full disks

Full disks and the lack of warning that you get about this can lead to serious problems.
So were my settings from some programs (Firefox) not saved. Happily I nailed the problem down before booting down or else I might have had log in problems.
See: http://brainstorm.ubuntu.com/idea/57/
And also: https://bugs.launchpad.net/ubuntu/hardy/+source/kdebase-workspace/+bug/99044
The only thing to do is watch the Nautilus window in the left corner very regularly to see how full your disk is. Of course you also have Gnome Disk Manager Tool. To see what is using your disk space.
Another possibility is to use the Gnome Config Editor:
"Go into Gconf-editor and /desktop/volume_manager and change the "percent_threshold" value to a higher value - 7% or something like that. " Unclear to me if that value should be changed from 0.05 to 7 or to 0.07. The aim is that you get a warning that your disk is nearly full.


To avoid fragmentation keep 20 % of your partition free!
(http://computertip.googlepages.com/veelgesteldevrageninubuntu)

Quote:
http://www.freesoftwaremagazine.com/books/zenoss/what_zenoss_can_tell_you

Ack! No disk space!

There are few things more disturbing to users than to attempt to log into the computer and be bounced right back out to the login prompt. Yet, this is precisely what happens if the /home partition fills up: with no space left on the drive, the shell can’t write temporary files it normally does on login, and the result is that you can’t log in (unless you’re root).

So, obviously it would be good to get a warning about systems where this is about to happen. Similar failures of the /, /var, /tmp, or /usr drives are not as catastrophic, but are by the same token more insidious. As a result, I long ago adopted the practice of doing a df to check disk usage as a first step whenever anything mysterious goes wrong on a system. Surprisingly often, this leads right to the source of the problem.


Solution for not being able to log in:

Using ctrl-alt-F1 at the normal login screen with get you a terminal login in Ubuntu if you are unable to access your login from the Gnome GUI. From there using rm to delete the large files will free up enough disk space to allow me to login normally with the GUI. Or move files to usb hard or flash drive.

Or after you are logged in type "sudo apt-get clean" without the quotation marks, enter your password again if prompted and restart to see if you can log in normally.


Good suggestions to empty your disk:

http://www.ubuntugeek.com/cleaning-up-all-unnecessary-junk-files-in-ubuntu.html

Empty Trashcan.

If you're running critically low on space (a gig is critically low? that makes me feel old), I would recommend opening Synaptic, going to Settings -> Preferences -> Files [tab] and telling the system to "Delete downloaded packages after installation.

Thursday, September 11, 2008

How to use and install GnomeDo

http://www.simplehelp.net/2008/07/09/how-to-install-setup-and-use-gnome-do/

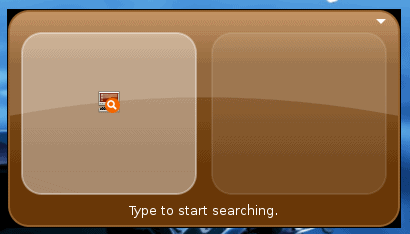
  1. To launch Gnome Do, select Applications -> Accessories -> GNOME Do.
  2. If it doesn’t pop up on your screen right away, hold down the Windows Key (also known in Ubuntu as the “Super” key) and hit the Space bar. That’s the default keystroke combination to bring up Gnome Do.
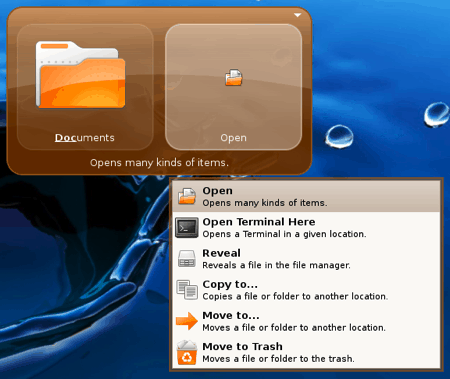
  3. Start typing the name of a file, folder or application. In the example below I started to type Documents but only got as far as Doc before Gnome Do recognized what I was going for. Hitting the enter key at this point would open up my Documents folder - because the action in the right pane is Open.
  4. As you type (again my example will be Documents) Gnome Do creates a “list” of things you might mean. Use the down arrow key to see all of the files, folders, bookmarks and programs that contain “doc” in them. You can use the down key and then enter to select an item.
  5. Once you have an item selected, use the Tab key to move over to the “action” section. As previously mentioned, the default action is “Open”. Again, use the down arrow key to view and/or select alternate actions - like Open Terminal Here, Copy to…, Move to… or Move to Trash.

Essential skills: best keyboard shortcuts Gnome

1. Switch to the next/previous workspace

If you make use of the workspace very frequently, you can easily switch between different workspaces by pressing Ctrl + Alt + Left/Right Arrow. The Left key brings you to the previous workspace while the Right key brings you to the next adjacent. If you have enabled Compiz, you can even get it to show all the workspace by pressing Super + E on the keyboard.

2. Move the current window to another workspace

By pressing Shift+ Ctrl + Alt + Left/Right Arrow, you can easily move your current window to another workspace in the specified direction. This keyboard shortcut works very well with the one mentioned above. If you have the habit of opening many applications/windows when doing your work, but don’t like to see your desktop and menubar cluttered with all the application windows, you can use this shortcut key to move your applications to another workspace and get your desktop organized.

3. Show the desktop

Ctrl + Alt + D enables you to quickly minimize all windows and give focus to the desktop. When all windows are minimized, this shortcut can also maximize all the windows to their previous state.

4. Keyboard shortcut for the mouse right-click

In most applications, you can always right-click on the mouse to access the options menu. On the keyboard, you can simply press Shift + F10 to achieve this ‘right-click‘ effect

5. Restart session and recover from crashes

There are very few instances where Ubuntu will crash totally. But if it does, you can press Ctrl + Alt + Backspace to restart the session, and 90% of the time, it will recover from the crashes.

6. Lock the screen quickly

If you need to leave your workstation for a while, you can quickly lock up your screen by pressing Ctrl + Alt + L and prevent unauthorized access by others.

7. Switch between windows in the reverse direction

Alt + Tab is a common shortcut key that allow you to switch between open windows. But do you know that by including the ‘Shift‘ button, you can reverse the windows switching direction? This is useful when you press Alt + Tab too fast and passed the window that you want to switch to. Simply press down the ‘Shift‘ button to go back to the previous window in the switch cycle.

8. Move windows with arrow keys

Press Alt+F7 to activate the Move window function and use any arrows key (up, down, left, right) to move the window around the screen.

9. Show hidden files

Most of the time, you won’t need to view the hidden files in your home folder, but in the event that you need to, you can press Ctrl + H inside the Nautilus (the file manager for Ubuntu) to show all hidden files.

10. Show file properties without right-clicking the mouse

The conventional way to view a file/folder properties is to right-click the mouse and select ‘Properties‘. Now you can just press Alt + Enter to get the Properties window to appear.


source: http://www.makeuseof.com/tag/10-useful-ubuntu-keyboard-shortcuts-that-you-might-not-know-of/

Blog Archive